By Brad Antoniewicz and Tushar Dalvi.
At Recon 2012 Travis Goodspeed and Sergey Bratus released the Facedancer, an extremely flexible piece of hardware for emulating and tinkering with USB devices. Although the Facedancer is very much it's own device, it evolved from another one of Travis Goodspeed's projects, the GoodFET, which is his own customized Flash Emulation Tool debugger for the MSP430 microcontroller.
The PCBs for each device can be ordered online however, the devices are not currently available pre-assembled. So if you want to play with them, you'll need to learn how to solder! Although some may see this as a pain, I personally love it and hope assembled boards are never released - it forces people to learn the fundamentals of what they're doing.
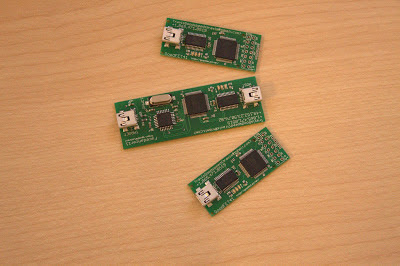
I've done almost no surface mount soldering before and have always wanted to play with USB so the Facedancer was a perfect project for me. Although I don't have much use for the GoodFET, two were generously included within my shipment, so I ordered the spare components and built them too.
In the end, here's the detailed part list I used. Everything was ordered from DigiKey, since that's were I bought my first 6.5535MHz crystal. I made a reddit post, just in case you want to add any updates.
Note: Although the 18pF capacitor might be a good capacitor, it is not ideal for the chosen crystal so the 27pF cap was chosen
Here's a quick video I put together showing the process:
Overall, I feel like hotplate reflow is cool but I don't know that it was really needed. I sort of cheated by running a super thin line of paste down across all of the pads on the PCB rather then being more precise with a toothpick. Since the paste didn't flow smoothly out of the syringe, I ended up getting uneven globs which eventually turned into bridges once the reflow completed. To fix the bridges, I ended up drag soldering (which is one of the most popular ways to hand solder surface mount components) so I could have probably just skipped the hotplate entirely. Also, the hotplate temperature is pretty hard to control, after completing the first board it took a long time for the plate to decrease in temperature, I got impatient and threw on the next board which put me pretty close to frying everything.
After that I gave everything a close inspection under magnification again and noticed a couple more tiny bridges. As I removed them, I accidentally broke one of the pins off of the MSP430. Normally this would be an issue, but since the pin wasn't used, it was ok to leave it alone. I reconnected the Facedancer to my computer and it worked!
And you'll also see a FTDI entry using
Next you'll need to install the prerequisites, download all of the supporting code from the SVN server, and build the client
You can define the board you're using via the
Now we can install the firmware:
This may or may not work for you. As of 11/26, you'll get this error:
So let's manually download and install:
Once everything has completed, just run a quick test to make sure nothing is broken!
Looks like everything is working. Now you'll need to dig throw a lot of python, the USB specifications and blog posts to do some awesome USB hacks. This is a great place to start:
Enjoy!

At Recon 2012 Travis Goodspeed and Sergey Bratus released the Facedancer, an extremely flexible piece of hardware for emulating and tinkering with USB devices. Although the Facedancer is very much it's own device, it evolved from another one of Travis Goodspeed's projects, the GoodFET, which is his own customized Flash Emulation Tool debugger for the MSP430 microcontroller.
The PCBs for each device can be ordered online however, the devices are not currently available pre-assembled. So if you want to play with them, you'll need to learn how to solder! Although some may see this as a pain, I personally love it and hope assembled boards are never released - it forces people to learn the fundamentals of what they're doing.
I've done almost no surface mount soldering before and have always wanted to play with USB so the Facedancer was a perfect project for me. Although I don't have much use for the GoodFET, two were generously included within my shipment, so I ordered the spare components and built them too.
Components
Both the Facedancer and GoodFET include a parts list on their description pages but when you go to order them from any supplier, you'll quickly realize there are a seemingly endless combination of options to choose from. After spending some time putting together an actual order, I jumped on #goodfet and asked for a little help. Luckily the channel is populated with hardware rock stars like Michael Ossmann and dragorn who were kind enough to help redefine my order, pointing out corrections to the online parts list that weren't published yet and alternate crystal options. Throughout the entire assembly process, these two defied standard irc help channel etiquette by offering extremely useful tips and troubleshooting suggestions - These guys ROCK!
In the end, here's the detailed part list I used. Everything was ordered from DigiKey, since that's were I bought my first 6.5535MHz crystal. I made a reddit post, just in case you want to add any updates.
| Package | Pg. Description | DigiKey Part | DigiKey Description |
| SSOP28 | FT232RL | 768-1007-1-ND | IC USB FS SERIAL UART 28-SSOP |
| QFP64 | MSP430F2618TPM | MSP430F2618TPM | IC MCU 16BIT 116K FLASH 64-LQFP |
| LQFP32 | MAX3420E | MAX3420EECJ+-ND | IC USB PERIPH CONTROLLER 32TQFP |
| 0603 | 1.0µF Capacitors | 587-1242-1-ND | CAP CER 1UF 10V 10% X7R 0603 |
| 0603 | 0.1µF Decoupling Capacitors | 490-1532-1-ND | CAP CER 0.1UF 16V 10% X7R 0603 |
| 0603 | 18pF Capacitors | 445-1272-1-ND | CAP CER 18PF 50V 5% NP0 0603 (see note) |
| 0603 | 27pF Capacitors | 490-1413-1-ND | CAP CER 27PF 50V 5% NP0 0603 |
| HC49/UP** | 12MHz SMD Crystal, 18pF | 535-10218-1-ND | CRYSTAL 12.000 MHZ 18PF SMD |
| 0603 | 0603 LED | 754-1121-1-ND | LED 1.6X0.8MM 568NM GRN CLR SMD |
| 0603 | 330R LED Series Resistors | RMCF0603JT330RCT-ND | RES 330 OHM 1/10W 5% 0603 SMD |
| 0603 | 33R USB Series Resistors | RMCF0603JT33R0CT-ND | RES 33 OHM 1/10W 5% 0603 SMD |
| N/A | USB Mini Receptacle UX60-MB-5ST | ED2992CT-ND | CONN USB MINI B R/A SMD |
Tools
Here's a list of tools I used to put it all together. Hopefully you have most of these already:| Soldering Iron. One of the biggest things is to get a good soldering iron - leave the crappy radio shack one on the shelf and get one with temperature control and a fine tip. I went for the Weller WES51. | |
| Flux! You won't understand how amazing this is until you use it. Then you'll question what the heck you were doing without out. I used the RadioShack stuff. Its messy, dragorn recommended ChipQuik No Clean Flux. | |
| Head mounted magnifier - There's probably a more official name for this :) It was extremely useful to have a head mounted magnifier over those stupid helping hands. I bought this one. | |
| Tweezers - Impossible to place surface mount capacitors without these guys. I used the Wiha 7a SA-ESD, which I think these are close to. | |
| Tip Cleaner. This helps keep the tip clean and help with spreading the solder when its dirty and needs to be tinned. This is the Hakko 599B. | |
| Multimeter - Extremely important for any electronics project. This is the Extech 430 | |
| Desoldering Braid - Helps when you mess up. So much easier to when you use a little flux with it. I used the RadioShack stuff. | |
| Solder - I used the RadioShack's 0.022" solder, that they don't have on their site. | |
| Hot Plate - When I started this project out, I was really excited to do some hot plate reflow. Before you buy anything, read the rest of this article :) This is the Brentwood TS-337 | |
| Soldering Paste - For hotplate reflow. I used the No Clean Zeph Paste. They didn't ship me the fine tips I ordered and haven't responded to any of my emails. :/ | |
| Infrared Thermometer - Needed for the hot plate reflow, this is the Kintrex IRT0421 |


Hot Plate Reflow
I wanted to try out the hot plate reflow technique because it looked really easy and seemed like a fun way to get everything done quickly. I also came across another great blog post showing how someone else used it for an earlier GoodFET, which helped me make my decision.Here's a quick video I put together showing the process:
Overall, I feel like hotplate reflow is cool but I don't know that it was really needed. I sort of cheated by running a super thin line of paste down across all of the pads on the PCB rather then being more precise with a toothpick. Since the paste didn't flow smoothly out of the syringe, I ended up getting uneven globs which eventually turned into bridges once the reflow completed. To fix the bridges, I ended up drag soldering (which is one of the most popular ways to hand solder surface mount components) so I could have probably just skipped the hotplate entirely. Also, the hotplate temperature is pretty hard to control, after completing the first board it took a long time for the plate to decrease in temperature, I got impatient and threw on the next board which put me pretty close to frying everything.
Drag Soldering
For future projects, I'll be drag soldering my surface mount components. It's just plain easy. Turn your soldering iron to about 725F, place the component, apply a generous amount of flux, tack down one pin to hold everything in place then semi-slowly drag the iron over multiple pins. The solder will hop from pin to pin leaving just enough to hold the part in place. This is an awesome video by Curious Inventor demonstrating the method:Troubleshooting
Once I had everything assembled, I connected it to my system and discovered the FT232R chip was not being recognized. I used the audible continuity tester on my multimeter to debug the issue. Starting from the host side USB connector, I tested the paths between the connector and the FTDI input pins which quickly revealed I had a small solder bridge. I used a some flux with the desoldering braid to clean it up and then drag soldered it a little more to make sure I had a good joint.After that I gave everything a close inspection under magnification again and noticed a couple more tiny bridges. As I removed them, I accidentally broke one of the pins off of the MSP430. Normally this would be an issue, but since the pin wasn't used, it was ok to leave it alone. I reconnected the Facedancer to my computer and it worked!
Software
Once everything is assembled on the Facedancer, connect the host side to your system.dmesg should show a similar set of logs: root@bt:~# dmesg
[7097779.953802] ftdi_sio 5-1:1.0: FTDI USB Serial Device converter detected
[7097779.953882] usb 5-1: Detected FT232RL
[7097779.953889] usb 5-1: Number of endpoints 2
[7097779.953896] usb 5-1: Endpoint 1 MaxPacketSize 64
[7097779.953903] usb 5-1: Endpoint 2 MaxPacketSize 64
[7097779.953909] usb 5-1: Setting MaxPacketSize 64
[7097779.955746] usb 5-1: FTDI USB Serial Device converter now attached to ttyUSB0
And you'll also see a FTDI entry using
lsusb root@bt:~# lsusb
Bus 005 Device 045: ID 0403:6001 Future Technology Devices International, Ltd FT232 USB-Serial (UART) IC
Next you'll need to install the prerequisites, download all of the supporting code from the SVN server, and build the client
 root@bt:~# apt-get install python-sqlite python-serial
 root@bt:~# svn co https://goodfet.svn.sourceforge.net/svnroot/goodfet
 root@bt:~# cd goodfet/trunk/client
 root@bt:goodfet/trunk/client# make link
You can define the board you're using via the
board environment variable. I tend to use different boards so I'll specify it on the command line. It's recommended that you first backup the info flash (be sure to store it in info.txt) from the board before installing the firmware, to do so: root@bt:goodfet/trunk/client# board=facedancer11 goodfet.bsl --dumpinfo > info.txt
Now we can install the firmware:
root@bt:goodfet/trunk/client# board=facedancer11 goodfet.bsl --fromweb
This may or may not work for you. As of 11/26, you'll get this error:
 The --fromweb feature is temporarily disabled, pending a rewrite.
 Please grab a copy of the appropriate .hex from
 http://goodfet.sf.net/dist/ and flash it like so:

 goodfet.bsl -e -p foo.hex
So let's manually download and install:
 root@bt:goodfet/trunk/client# wget http://goodfet.sourceforge.net/dist/facedancer11.hex
 root@bt:goodfet/trunk/client# board=facedancer11 goodfet.bsl -e -p facedancer11.hex
 MSP430 Bootstrap Loader Version: 1.39-goodfet-8
 Mass Erase...
 Transmit default password ...
 Invoking BSL...
 Transmit default password ...
 Current bootstrap loader version: 2.13 (Device ID: f26f)
 Program ...
 4932 bytes programmed.
Once everything has completed, just run a quick test to make sure nothing is broken!
 root@bt:goodfet/trunk/client# bboard=facedancer11 goodfet.monitor test
 Performing monitor self-test.
 Self-test complete.
Looks like everything is working. Now you'll need to dig throw a lot of python, the USB specifications and blog posts to do some awesome USB hacks. This is a great place to start:
Enjoy!
Image may be NSFW.
Clik here to view.![]()
Clik here to view.
